Programming 101 - Angular 'n Bootstrap EP. 01

สอนใช้งาน Angular เบื้องต้น และการติดตั้ง Bootstrap 4 ร่วมกับ Angular 8 ในบทความนี้เราจะมาสอนการใช้งาน Bootstrap 4 ร่วมกับ Angular 8 รวมทั้ง Angular Component และการใช้ Bootstrap Theme เบื้องต้นสำหรับเริ่ม Project ใหม่
สวัสดีครับห่างหายจากการเขียนบล๊อคไปนาน วันนี้ผมก็จะกลับมาเขียนใหม่นะครับ โดยมารอบนี้จะเขียนเป็นซีรี่เลยชื่อซีรี่ว่า Angular ‘n Bootstrap โดยเนื้อหาในซีรี่นี้เราจะสอนตั้งแต่เริ่มต้นการใช้งาน สอนไปเรื่อยๆ แล้วแต่อารมณ์คนเขียนนะครับ แต่สัญญาว่ารอบนี้จะเขียนยาวๆ ไม่หายไปไหนแล้วนะจ๊ะ ปล. เราจะเน้นการปฎิบัติมากกว่าทฤษฎีนะครับ เพราะทฤษฎีเราไม่มีเรามีแต่ทฤษเดา 55555
Prepare
สิ่งที่ต้องการก่อนเริ่มอ่านบทความนี้
- ความรู้พื้นฐาน Javascript
- ความรู้พื้นฐาน Bootstrap
- ติดตั้ง Angular CLI บนเครื่องให้เรียบร้อย
Angular คือ Javascript Framework ตัวนึงเกิดขึ้นมาตั้งแต่ปี 2016 โดยในปัจจุบันก็มาถึง version 8 แล้วนะครับ ข้อดีของ Angular คือ Code สามารถนำไป reuse ได้ง่ายเครื่องไม้เครื่องมือมีครบ และที่สำคัญคือ two-way binding ทำให้ทุกอย่างง่ายขึ้นเยอะ สำหรับข้อมูลเพิ่มเติมอื่นๆ สามารถหาอ่านได้ที่ angular.io นะครับ
New Angular Project
เปิด Terminal ขึ้นมาแล้วพิมพ์คำสั่ง
ng new awesome-angular
จะขึ้นหน้าจอถามว่าต้องการใช้ style ประเภทไหนผมเลือก css และมีคำสั่งถามว่าต้องการใช้ angular route หรือไม่ให้ตอบ yes

เมื่อทำการตั้งค่าเสร็จให้พิมพ์คำสั่ง
cd awesome-angular
เพื่อเข้าไปใน Directory Project โดย Project จะมีโครงสร้างที่ต้องสนใจ ดังนี้
awesome-angular
├── src
│   ├── assets // สำหรับเก็บ assets ต่างๆ ที่ต้องการใช้ใน Project
│   │   ├── css
│   │   ├── js
│   │   ├── image
│   └── app
│       ├── app-routing.module.ts // ที่สำหรับวาง route
│       ├── app.component.css // โค้ด css สำหรับ component หลัก
│       ├── app.component.ts // สำหรับวาง logic component หลัก
│       ├── app.component.html // template html ของ component หลัก
│       └── app.module.html // module หลักของระบบ
├── angular.json // เก็บ setting สำหรับ angular cli
└── package.json // เก็บ setting และ package ต่างๆของโปรเจค
Install Bootstrap
เมื่อเราสร้างโปรเจคเสร็จแล้วนะครับต่อมาเราก็จะมาทำการติดตั้ง Bootstrap Plugin ให้ Angular กันนะครับโดยขั้นตอนก็มีง่ายๆ โดยพิมพ์คำสั่ง
npm install boostrap jquery popper.js --save
เมื่อติดตั้งเสร็จแล้วให้เปิดไฟล์ชื่อว่า angular.json และเพิ่มรายละเอียดดังนี้
...
"styles": [
    "src/styles.css",
    "./node_modules/bootstrap/dist/css/bootstrap.min.css", // เพิ่ม
],
"scripts": [
    "./node_modules/jquery/dist/jquery.min.js", // เพิ่ม
    "./node_modules/bootstrap/dist/js/bootstrap.js" // เพิ่ม
],
...
Change Theme (Optional)
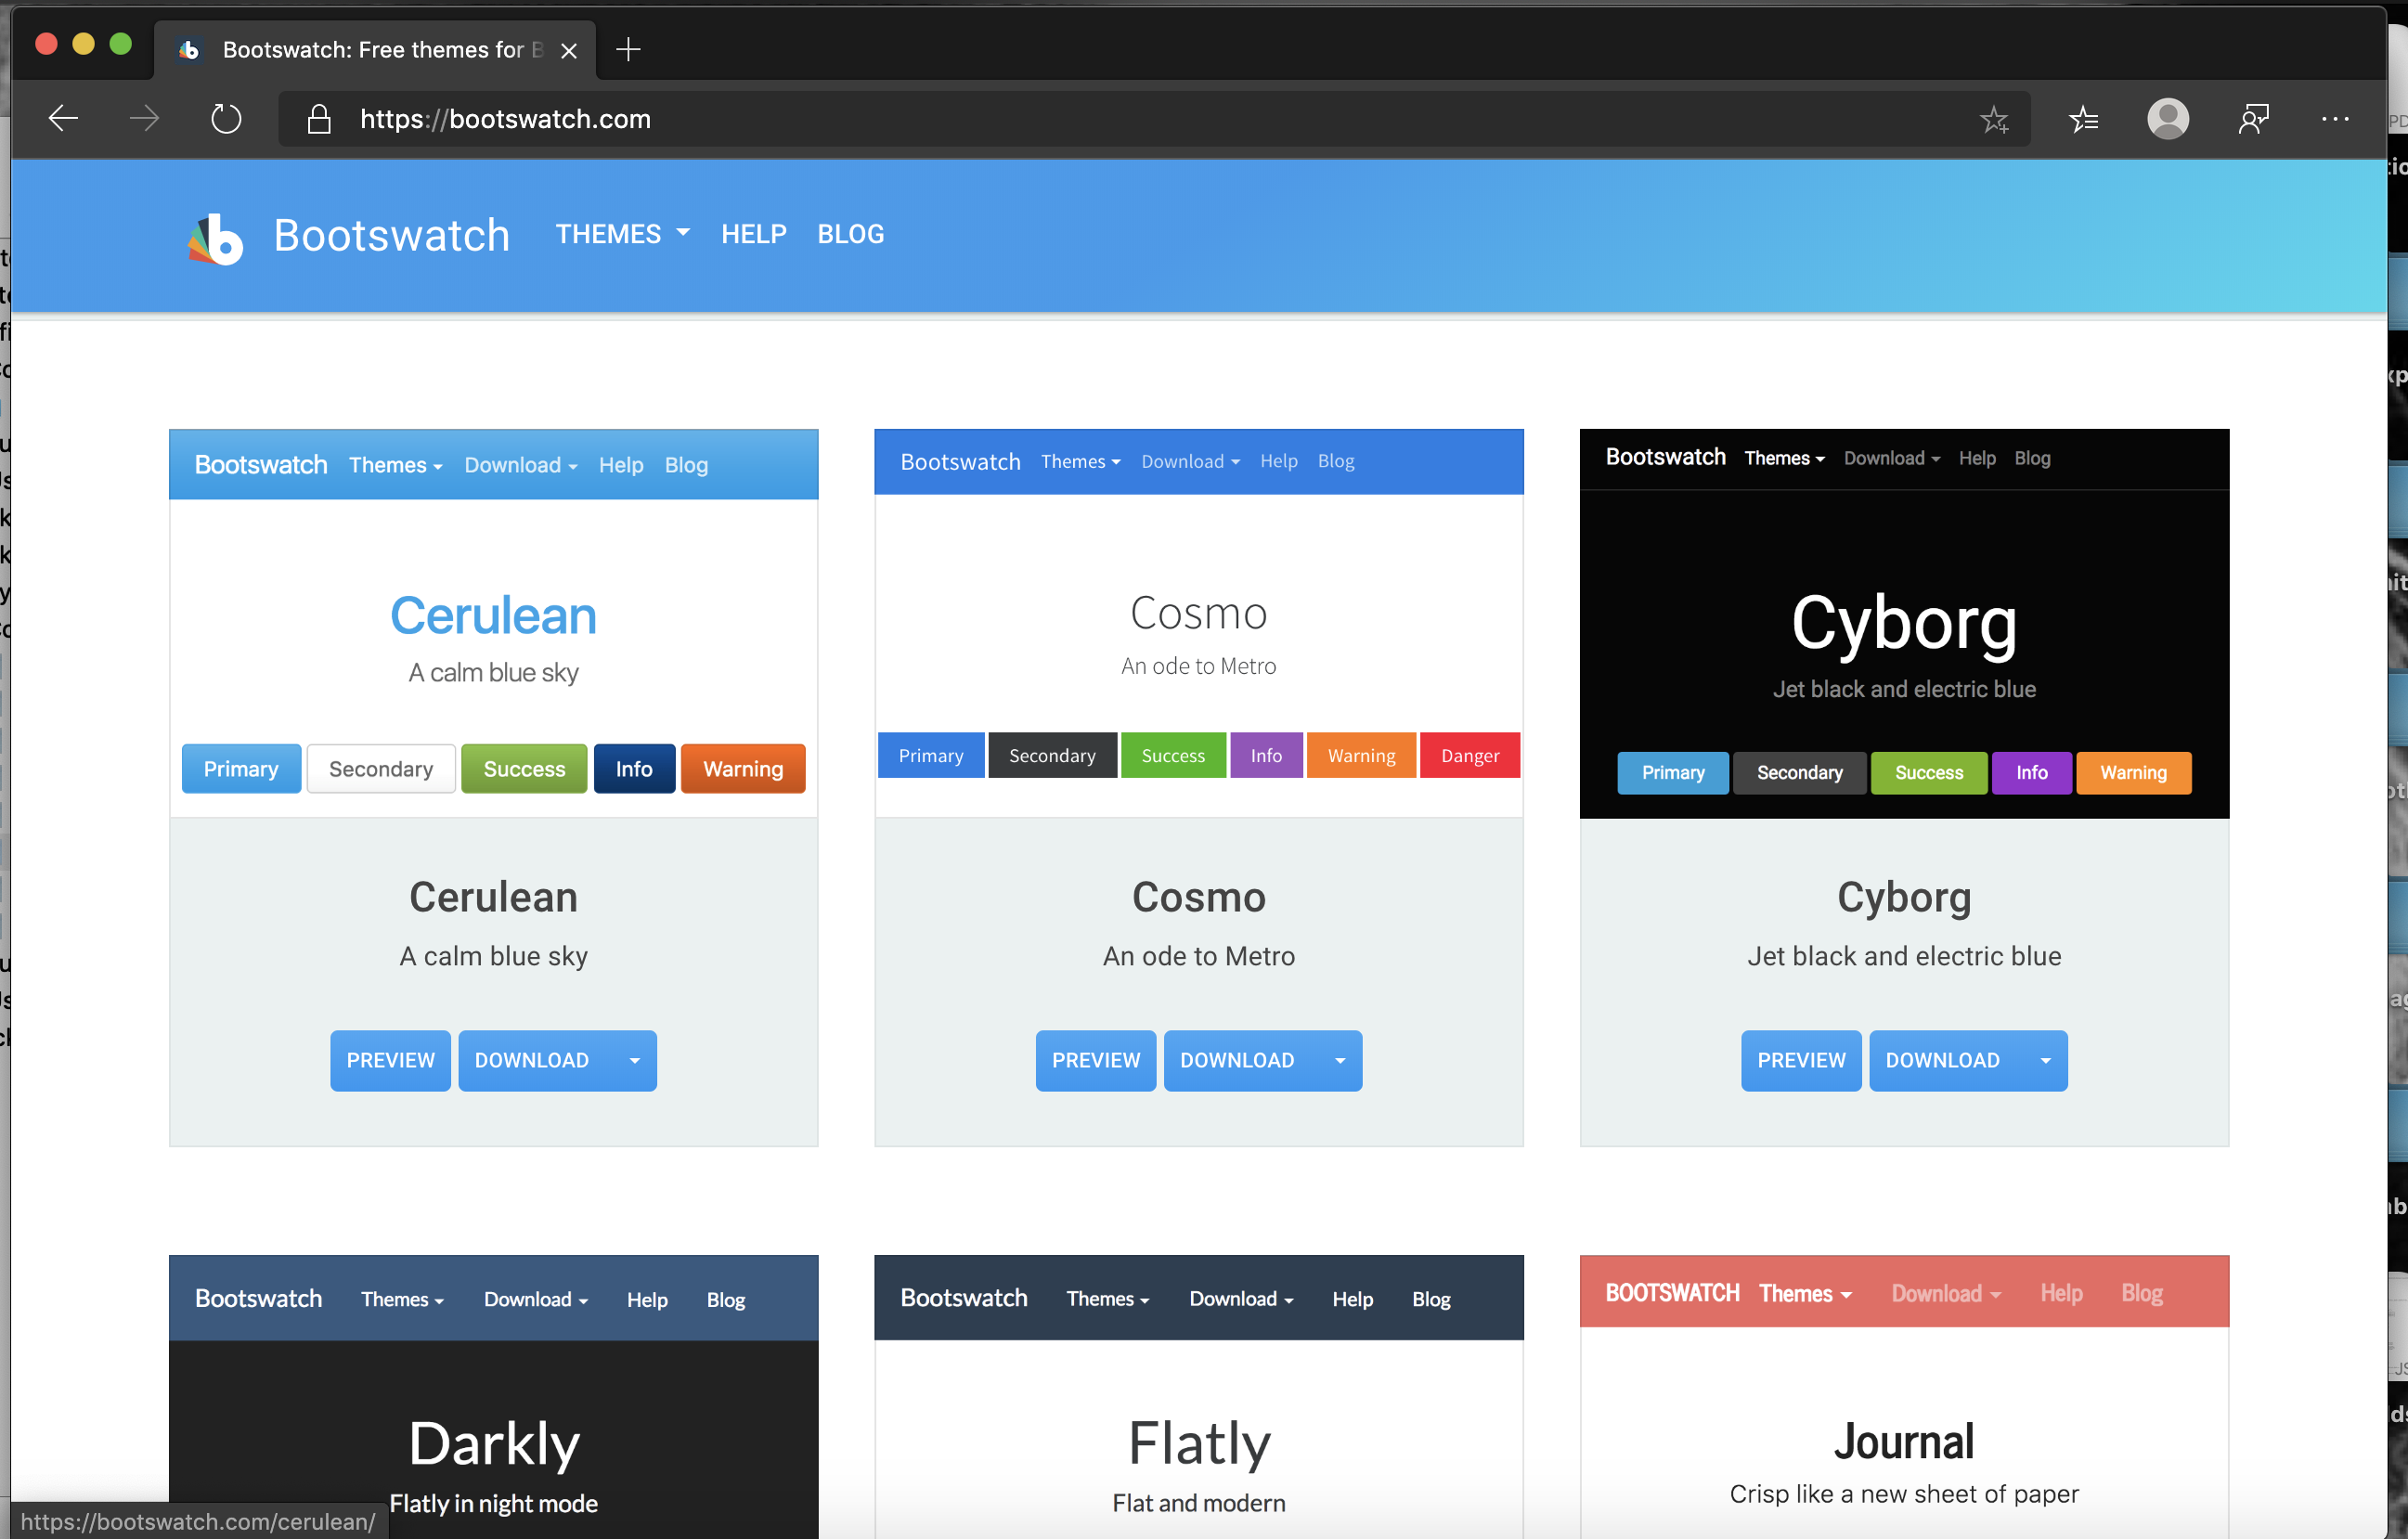
หากต้องการเปลี่ยนธีมให้เปิดไปที่เว็บไซด์ bootswatch โดยเว็บนี้รวบรวม Theme Bootstrap ตั้งต้นไว้ให้เราเอาไปพัฒนาต่อง่าย

เมื่อเลือก theme ได้แล้วให้คลิ๊กที่ ชื่อ Theme และ bootstrap.min.css เว็บไซด์จะทำการดาวโหลดไฟล์ bootstrap.min.css นำไฟล์ไปวางไว้ที่ src/assets/css/
และเปิดไฟล์ angular.json อีกครั้งเพื่อแก้ไข
...
"styles": [
    "src/styles.css",
    "src/assets/css/bootstrap.min.css", // แก้ไข
],
...
หลังจากนั้นพิมพ์คำสั่ง
ng serve
แล้วเปิด Browser ไปที่ localhost:4200 จะพบหน้าตาดังนี้

ต่อมาเราจะมาทำความรู้จักกับ Angular Component และ Angular Route เบื้องต้น
Angular Component
ใน Angular หน้าเว็บจะเป็นแบบ single page หมายความว่าตัว Angular มองส่วนประกอบต่างๆ ของหน้าเว็บแยกเป็นส่วนแยกออกจากกัน(Component) แล้วนำมาประกอบกันเพื่อให้การเป็นเว็บไซด์ โดยวันนี้เว็บไซด์ที่เราจะทำเราจะแยก Component เป็น 3 ส่วนง่ายๆ ดังนี้

- App Component คือที่วางหน้าหลักของเรา
- Navbar Component มีไว้สำหรับนำทางไปที่หน้าต่างๆ
- Content Component มีไว้สำหรับวาง Content ต่างๆ ของเว็บไซด์ของเรา
Create Component
ต่อมาเราจะมาสร้าง Angular Component กันนะครับวิธีสร้างก็ง่ายๆ ให้เปิด terminal ขึ้นมาแล้วพิมพ์คำสั่งว่า
ng generate component shared/navbar
ng generate component page/about
ng generate component page/home
ng generate component page/features
Command Description
ng generateหรือng gคือคำสั่งสำหรับสร้างส่วนประกอบของ angularcomponentหรือcคือสื่งที่ต้องการสร้างซึ่งมีหลายอย่างเช่น component pipe service module เป็นต้นshared/navbarคือชื่อสิ่งที่ต้องการสร้าง การใส่ shared/ ข้างหน้าหมายความว่าสร้างไว้ใน Directory ชื่อว่า Shared ซึ่งถ้าไม่มี Angular CLI จะทำการสร้าง Directory ให้
หลังจากพิมพ์คำสั่งเสร็จแล้วเมื่อดูในโปรเจค Directory จะพบไฟล์เพิ่มขึ้นมาดังนี้
...
│   └── app
│       ├── page // เพิ่มใหม่
│       │   ├── about // หน้า about
│       │   │   ├── about.component.css
│       │   │   ├── about.component.html
│       │   │   ├── about.component.spec.ts
│       │   │   ├── about.component.ts
│       │   ├── home // หน้า home
│       │   │   ├── home.component.css
│       │   │   ├── home.component.html
│       │   │   ├── home.component.spec.ts
│       │   │   ├── about.component.ts
│       │   ├── features // หน้า features
│       │   │   ├── features.component.css
│       │   │   ├── features.component.html
│       │   │   ├── features.component.spec.ts
│       │   │   ├── features.component.ts
│       ├── shared // เพิ่มใหม่
│       │   ├── navbar // navbar
│       │   │   ├── navbar.component.css
│       │   │   ├── navbar.component.html
│       │   │   ├── navbar.component.spec.ts
│       │   │   ├── navbar.component.ts
...
Create Navbar
ต่อมาเรามาทำ Navbar เพื่อสำหรับเป็น Navigation ไปที่ต่างๆ นะครับโดยให้เราเปิดไฟล์ navbar.component.html ขึ้นมาและใส่โค้ดดังนี้
<nav class="navbar navbar-expand-lg navbar-dark bg-dark">
  <a class="navbar-brand" href="#">Navbar</a>
  <button class="navbar-toggler" type="button" data-toggle="collapse" data-target="#navbarColor02" aria-controls="navbarColor02" aria-expanded="false" aria-label="Toggle navigation">
    <span class="navbar-toggler-icon"></span>
  </button>

  <div class="collapse navbar-collapse" id="navbarColor02">
    <ul class="navbar-nav mr-auto">
      <li class="nav-item active">
        <a class="nav-link" [routerLink]="['/home']">Home </a>
      </li>
      <li class="nav-item">
        <a class="nav-link" [routerLink]="['/features']">Features</a>
      </li>
      <li class="nav-item">
        <a class="nav-link" [routerLink]="['/about']">About</a>
      </li>
    </ul>
    <form class="form-inline my-2 my-lg-0">
      <input class="form-control mr-sm-2" type="text" placeholder="Search">
      <button class="btn btn-secondary my-2 my-sm-0" type="submit">Search</button>
    </form>
  </div>
</nav>
โดยโค้ดที่สำคัญตรงนี้คือ
<a class="nav-link" [routerLink]="['/home']">Home </a>
คำสัง [routerLink]="['/home']" คือบอกว่าให้ route ไปที่หน้าไหนคล้ายกับ href="/home"
Home Markup (Optional)
เพื่อความสวยงามนะครับเรามาแต่งหน้า Home กันหน่อยให้เปิดไฟล์ home.component.html ขึ้นมาแล้วใส่ Code ดังนี้
<div class="position-relative overflow-hidden p-3 p-md-5 m-md-3 text-center bg-light">
  <div class="col-md-5 p-lg-5 mx-auto my-5">
    <h1 class="display-4 font-weight-normal">Noob Studio Is The Best</h1>
    <p class="lead font-weight-normal">Noob Studio Is The Best. Freelance developer for hire him please see website <a href="https://noob-studio.github.io">noob-stuio.github.io</a></p>
    <a class="btn btn-outline-secondary" href="https://noob-studio.github.io">Go!</a>
  </div>
  <div class="product-device box-shadow d-none d-md-block"></div>
  <div class="product-device product-device-2 box-shadow d-none d-md-block"></div>
</div>
ปล. แอบขายของนิดนึงนะครับ 55555
Angular Routing
เมื่อเราเตรียมโครงสร้างของเว็บเสร็จแล้วต่อมาเราจะนำมาประกอบกันเพื่อให้กลายเป็นเว็บไซด์ต่างๆ นะจ๊ะ
Set Route
ขั้นตอนแรกให้เปิดไปที่ไฟล์ app-routing.module.ts และเพิ่มโค้ดดังนี้
...
import { AboutComponent } from './page/about/about.component';
import { FeaturesComponent } from './page/features/features.component';
import { HomeComponent } from './page/home/home.component';

const routes: Routes = [{
  path: '',
  redirectTo: 'home',
  pathMatch: 'full',
},{
  path: 'home',
  component: HomeComponent,
},{
  path: 'features',
  component: FeaturesComponent,
},{
  path: 'about',
  component: AboutComponent,
}];

@NgModule({
...
ขั้นตอนแรกให้เรา import component ต่างๆ ที่เราต้องการ route เข้ามานะครับให้สังเกตุว่าเราไม่ได้ import navbar.component เข้ามาเพราะเราไม่ได้ต้องการจะ route ไปที่ navbar.component นะครับ
import { AboutComponent } from './page/about/about.component';
import { FeaturesComponent } from './page/features/features.component';
import { HomeComponent } from './page/home/home.component';
ต่อมาเราทำการ set route ไว้ในตัวแปลชื่อว่า routes โดยมีประเภทเป็น Routes ที่ใส่ const ไว้เพื่อไม่ให้ตัวนี้สามารถแก้ไขได้ และหากสังเกตุจะเห็นว่ามันเป็น json array
const routes: Routes = [{
...
}]
ต่อมาเราอธิบายใส่ในของ route กันนะครับ object ตัวแรกคือการ set default ว่าถ้าเข้ามาที่ path แรกจะให้ route ไปที่ไหน
path:หมายถึง path ที่ตรงกับ route นี้redirectTo:หมายถึงให้ redirect ไปที่ path ไหนpathMatch:ความตรงกันของ path (เงี่ยนไขที่จะ redirect)
{
  path: '',
  redirectTo: 'home',
  pathMatch: 'full',
}
...
ในส่วนสุดท้าย set route สำหรับวิ่งไปหน้าอื่นๆ นะครับ
path:หมายถึง path ที่ตรงกับ route นี้component:หมายถึง component ที่ควบคุม route นี้ซึ่งเราได้ import มาตอนต้นแล้ว
...
{
  path: 'home',
  component: HomeComponent,
}
...
แค่นี้ก็เป็นอันเสร็จสิ้นสำหรับการ Set Route แล้วนะครับ
Assemble
ส่วนสุดท้ายแล้วนะจ๊ะ เราจะมาประกอบร่าง Component ทั้งหมดกันก่อนอื่นให้เปิดไฟล์ชื่อว่า app.component.html ขึ้นมาแล้วแก้เป็นแบบนี้
<app-navbar></app-navbar>
<router-outlet></router-outlet>
<app-navbar></app-navbar>คือ selector (แบบว่าเหมือนชื่อเล่นของ component เอาไว้เรียกใช้งานงี้มั้ง) มาจากไฟล์ navbar.component.ts
...
@Component({
  selector: 'app-navbar', // <------ ตรงนี้
...
<router-outlet></router-outlet>เป็น selector ของ Angular
สุดท้ายพิมพ์คำสั่ง
ng serve
แล้วเปิดไปที่หน้า http://localhost:4200 หน้าเว็บก็จะแสดงผลหน้าตาเว็บไซด์ประมาณนี้

หากกดข้างบนเปลี่ยนไปที่หน้าอื่นก็จะขึ้นว่า about works!! หรือ features works!!
หากเราสังเกตุจะเห็นว่าเว็บไซด์ได้ถูก redirect ไปที่ http://localhost:4200/home
Error WTF!!
หากลองรันแล้วพบ error ให้ลองตรวจสอบไฟล์ app.module.ts ดูว่ามีการตั้งค่าดังนี้หรือไม่
- import component ที่สร้างขึ้นและ
AppRoutingModule
...
import { AppRoutingModule } from './app-routing.module';
import { HomeComponent } from './page/home/home.component';
import { NavbarComponent } from './shared/navbar/navbar.component';
import { AboutComponent } from './page/about/about.component';
import { FeaturesComponent } from './page/features/features.component';
...
- เรียกใช้งาน component และ module ที่ import มาถูกต้อง
...
@NgModule({
  declarations: [ // สำหรับใส่ component
    AppComponent,
    HomeComponent,
    NavbarComponent,
    AboutComponent,
    FeaturesComponent
  ],
  imports: [ // สำหรับใส่ module
    BrowserModule,
    AppRoutingModule
  ],
  providers: [],
  bootstrap: [AppComponent]
})
...
Conclusion
เป็นอันเรียบร้อยไปแล้วนะครับสำหรับ Angular ‘n Bootstrap EP 01 ยังไงเพื่อนๆชอบไม่ชอบก็สามารถเข้ามาติชมกันที่แฟนเพจ noob studio ได้นะครับ สำหรับเพื่อนๆคนไหนที่สนใจตัวอย่างโค้ด สามารถดูได้ที่ github ของเรานะจ๊ะ